Choosing an Oil Cooled Welding Machine is not just a matter of picking the highest amperage. The right unit should match your welding process, materials, workload, and available power supply. A machine used for occasional repairs in a small workshop may have very different needs from one running repeated production cycles. Cooling design matters, too. Check the manufacturer’s stated duty cycle, output range, and operating limits rather than assuming that an oil-cooled model can run continuously. Details count.
Start with the work itself. Note the material thickness, joint type, and expected weld frequency. Then compare those needs with the machine’s specifications. A clear, accessible control panel can help operators set repeatable parameters, while suitable cables and connectors make daily handling easier. Ask about oil inspection, replacement intervals, and service access before buying. These practical questions are easy to overlook. They shouldn’t be.
Also consider the work area. Measure the machine’s footprint, confirm that the power supply is suitable, and account for ventilation and safe clearance around the unit. If possible, speak with a qualified supplier or technician who understands your application. Their advice should be checked against the product documentation, not accepted blindly. No single model fits every shop, and a specification sheet cannot reveal every inconvenience. Think about noise, maintenance time, and how often settings may change. A careful comparison helps you choose a reliable machine without paying for capacity your work rarely needs.
How Oil-Cooled Welding Machines Work
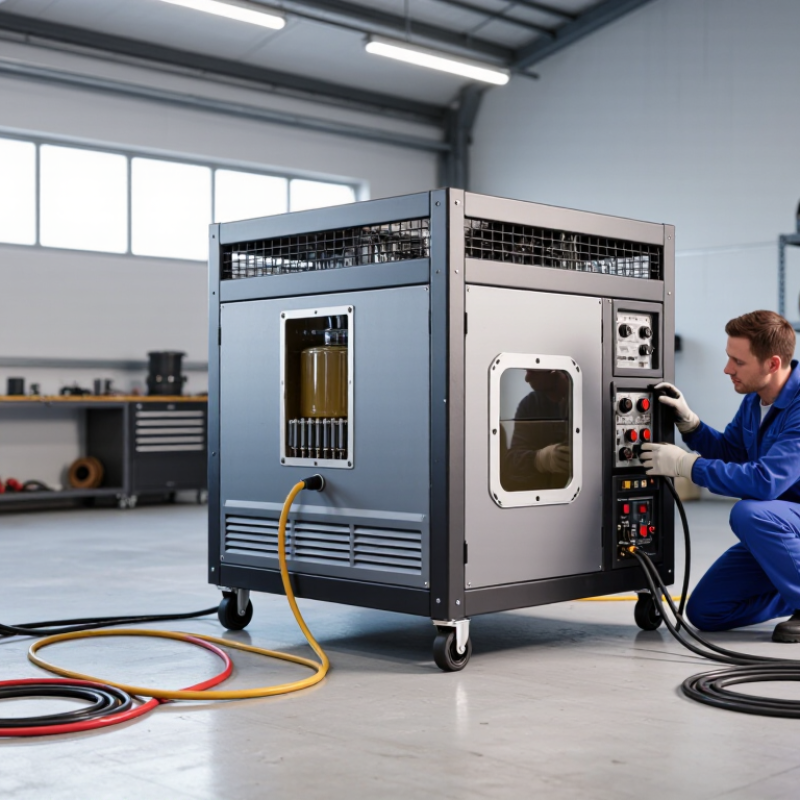
An oil-cooled welding machine uses insulating oil to carry heat away from its transformer. Electrical resistance in the windings creates heat, while the energized core adds further losses. The oil absorbs this heat and rises through the tank by natural convection. Cooler oil then moves down, creating a continuous circulation loop. Some designs use pumps or radiators to improve heat transfer. The oil also helps electrically insulate internal components.
It does not carry the welding current. Not the welding circuit.
IEC 60076-2:2011 gives a 60 K top-liquid temperature-rise limit for specified liquid-immersed transformer designs. This is useful context, not a universal welding-machine limit; follow the equipment’s own rating plate and manual.
In practice, inspect the oil level, tank seams, hoses, and cooling surfaces before demanding work. A thin leak can lower the oil level and weaken heat removal. Small leaks matter.
IEC 60422 provides guidance for supervising and maintaining mineral insulating oil, including checks for contamination and deterioration. Still, clear-looking oil is not proof of good condition. Moisture and aging products may not be obvious, so testing and service intervals should follow the maker’s instructions.
Do not assume a cooler tank means the windings are cool.
Identify the Welding Processes, Materials, and Tasks You Need
Choose the machine around the welds you actually make. An oil-cooled unit may suit long, demanding runs, but cooling alone does not tell you which process it supports. Confirm whether it is designed for stick welding, TIG, or another process. Check its output range, AC/DC options, duty cycle, and available power supply.
Material and task details matter just as much. Mild-steel repairs on a farm gate differ from repeated passes on thick plate or precise work on stainless steel. Note material type and thickness, joint position, electrode requirements, and how long the machine must run before cooling. A tight corner, long cable, or frequent setup changes can affect the choice too. Easy to overlook.
The U.S. Bureau of Labor Statistics projects about 45,800 annual openings for welders, cutters, solderers, and brazers from 2023 to 2033; that broad workload makes matching equipment to specific jobs especially practical (BLS, Occupational Outlook Handbook).
A shop’s real task mix can be messier than its job sheet. Leave room for occasional work, but do not pay for capabilities you will rarely use.
Compare Output Range, Duty Cycle, and Cooling Capacity
An oil-cooled welding machine should suit the metals, electrode sizes, and work rhythm you actually use. Check its output range, not just the maximum amperage. Thin sheet needs steady control at lower settings, while thicker sections may require more current and larger electrodes. Thin sheet needs control. If most jobs sit near the machine’s upper limit, it may feel underpowered in practice.
Duty cycle shows how long the machine can weld within a ten-minute period at a stated current. For example, a 60% rating at 200 amps means six minutes of welding, followed by four minutes of rest under the specified test conditions. Higher output usually reduces duty cycle. Read the rating at the amperage you expect to use; comparing headline figures alone can mislead. The label matters.
Cooling capacity also deserves a close look. Oil helps carry heat away from internal components, but airflow, ambient temperature, and blocked vents affect performance. In a warm shop, with repeated long welds, a machine that works comfortably in a cool showroom may need more cooling time. Keep the cooling passages clear, and follow the manufacturer’s oil and maintenance guidance. A practical choice is not always obvious. Estimate your typical amperage and welding time, then leave some headroom; people often underestimate how frequently short jobs turn into longer ones.
How to Choose an Oil Cooled Welding Machine for Your Needs - Compare Output Range, Duty Cycle, and Cooling Capacity
The ranges below are selection guidelines for welding-current needs, not specifications for a particular machine. Actual output, duty cycle, and cooling performance vary by welding process and model; confirm them on the machine’s rating plate and in its manual.
| Workload profile |
Suggested output-current range |
Duty-cycle target to compare |
Cooling capacity to look for |
Typical use and selection notes |
| Light, intermittent work |
About 80–160 A |
Around 20–35% at the intended working current |
A rating suitable for short welds with cooling pauses; check the specified ambient-temperature conditions. |
Light fabrication and repair. Confirm that the machine can maintain a stable arc at the lower end of the required range. |
| General workshop use |
About 160–250 A |
Around 40–60% at the intended working current |
Look for clearly stated duty-cycle ratings at more than one output setting, plus over-temperature protection. |
A practical range for varied repair and fabrication tasks. Check input-power requirements and the process-specific output ratings. |
| Heavy fabrication |
About 250–400 A |
Around 60–80% at the intended working current |
Prioritize continuous heat removal at the planned current; review the cooling-system design and required maintenance. |
Suitable for longer welds and heavier sections when the machine, cables, and power supply are all rated for the load. |
| High-utilization production |
About 400 A and above, where the process requires it |
Around 80–100% at the required working current |
Verify the stated continuous-duty rating under the actual site conditions; do not infer capacity from oil volume alone. |
For sustained operation, compare input supply, thermal limits, service access, and any required external cooling equipment. |
How to compare ratings: Duty cycle is the percentage of a stated time period that a welder can operate at a specified output without exceeding its thermal limits. Compare figures only when the rating period, output current, test standard, and ambient conditions are comparable. For oil-cooled equipment, follow the manufacturer’s requirements for oil type, level, inspection, and replacement.
Assess Power Supply, Portability, Controls, and Maintenance
Before choosing an oil-cooled welding machine, match its input voltage and phase to the actual workshop supply. Check breaker capacity too; a machine that starts reliably may still trip a shared circuit under load. IEC 60974-1 expresses welding duty cycle over a 10-minute period, so compare ratings at the amperage you expect to use. A high headline output means little if the duty cycle is low. Check the outlet.
Portability is more than the machine’s listed weight. Measure the route from vehicle to work area, including stairs and narrow doors, and account for leads and accessories. Oil-cooling can add weight and service points. In its workforce data, the American Welding Society projected 360,000 welding professionals would be needed by 2027; equipment with clear controls may reduce setup friction for less-experienced operators. Still, simple controls do not replace training. That matters.
Look for legible current settings, clear overload warnings, and controls that remain usable with gloves. Ask how often the oil and any filters require service, and whether inspection points are easy to reach. Check for leaks after operation, especially around fittings and seals. A spec sheet can still mislead: compare the stated duty cycle with your real weld length, ambient temperature, and break pattern. A little inconvenient, but useful.
How to Choose an Oil-Cooled Welding Machine
Suggested decision weights for comparing power supply, portability, controls, and maintenance.
These weights are a practical starting point, not measured industry statistics. Before buying, confirm the machine’s rated input voltage and current match your supply, and check its operating weight, control features, and manufacturer-specified maintenance requirements.
Select a Machine That Fits Your Workspace, Budget, and Safety Needs
Choose an oil-cooled welding machine around the work you actually do. Check its rated output and duty cycle against your usual material and thickness. Peak output alone can mislead. Measure twice. Note the doorway width, available floor space, and power supply before comparing machines. Oil-cooled units may be heavy, so leave room to reach inspection points and move the machine safely.
Look beyond the purchase price. Include installation, suitable cables, routine oil checks, and possible service costs in your budget. A lower-priced machine may seem sensible, but poor access for maintenance can make ownership frustrating. Consider how far the machine sits from the workbench; long cable runs can affect setup and may require appropriately rated cables. Ask a qualified supplier or technician to confirm compatibility with your electrical supply and typical workload.
Safety should shape the choice, not follow it. Review the operating manual for required clearances, inspection intervals, and handling instructions. Check that the work area supports good ventilation, secure cable routing, and safe access to emergency power controls. Inspect the cooling system for signs of leakage, and do not operate equipment that appears damaged. Provide suitable eye, hand, and body protection for the welding process. Even a well-matched machine can become a poor choice if routine checks are awkward or easily skipped.
Conclusion
Choosing an Oil Cooled Welding Machine starts with understanding how its cooling system helps manage heat during welding. Consider the processes you plan to use, the materials you will work with, and the kinds of tasks you need to complete. These details help determine the required output range and whether the machine can support your expected workload.
Compare duty cycle and cooling capacity to make sure the equipment suits the length and intensity of your work sessions. Also check that the power supply matches your workspace, and consider portability, control options, and routine maintenance. Finally, weigh the machine’s features against your budget and available space, while planning for a safe, well-organized work area. A careful assessment of these factors can help you select equipment that is practical for your needs and dependable over time.